2.1.3. Lab 3: Configure Local Logging For Firewall Events
Security logging needs to be configured separately from LTM logging.
High Speed Logging for modules such as the firewall module requires three componenets.
- A Log Publisher
- A Log Destination (local-db for this lab)
- A Log Profile
For more detailed information on logging please consult the BIG-IP documentation.
In this lab, we will configure a local log publisher and log profile. The log profile will then be applied to the virtual server and tested.
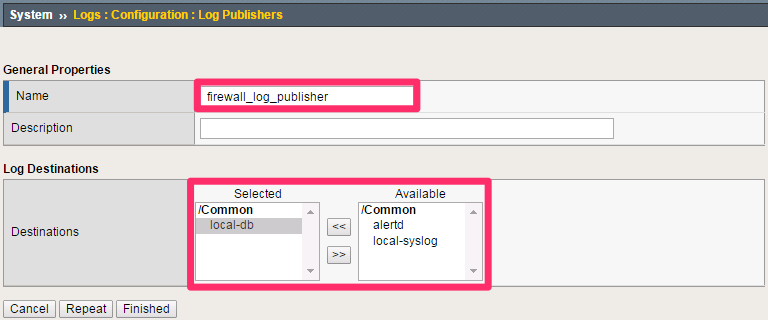
2.1.3.1. Create A Log Publisher
This will send the firewall logs to a local database.
Create the log publisher using the following information:
Navigation: System > Logs > Configuration > Log Publishers, then click Create
| Name | firewall_log_publisher |
|---|---|
| Destinations (Selected) | local-db |
Note
Leave all other fields using the default values.
Navigation: Click Finished
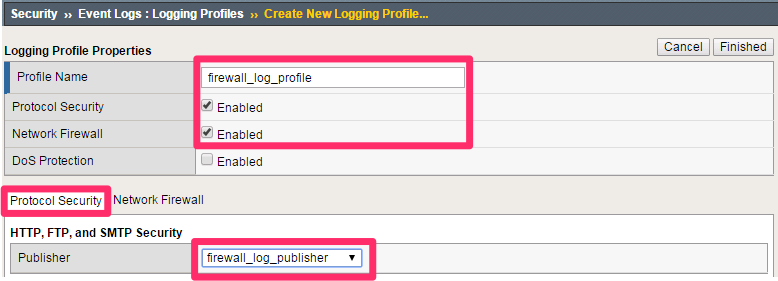
2.1.3.2. Create A Log Profile
Create the log profile using the following information:
Navigation: Security > Event Logs > Logging Profiles, then click Create
| Name | firewall_log_profile |
|---|---|
| Protocol Security | Checked |
| Network Firewall | Checked |
2.1.3.3. Modify The Log Profile To Collect Protocol Security Events
Edit log profile protocol security tab using the following information:
Navigation: Click on the Protocol Security tab and select the firewall_log_publisher
| firewall_log_publisher |
Note
Leave all other fields using the default values.
2.1.3.4. Modify The Log Profile To Collect Firewall Security Events
Edit log profile network firewall tab using the following information:
Navigation: Click on the Network Firewall tab
| Network Firewall Publisher | firewall_log_profile |
|---|---|
| Log Rule Matches | Check Accept Check Drop Check Reject |
| Log IP Errors | Checked |
| Log TCP Errors | Checked |
| Log TCP Events | Checked |
| Log Translation Fields | Checked |
| Storage Format | Field-List (Move all to Selected Items) |
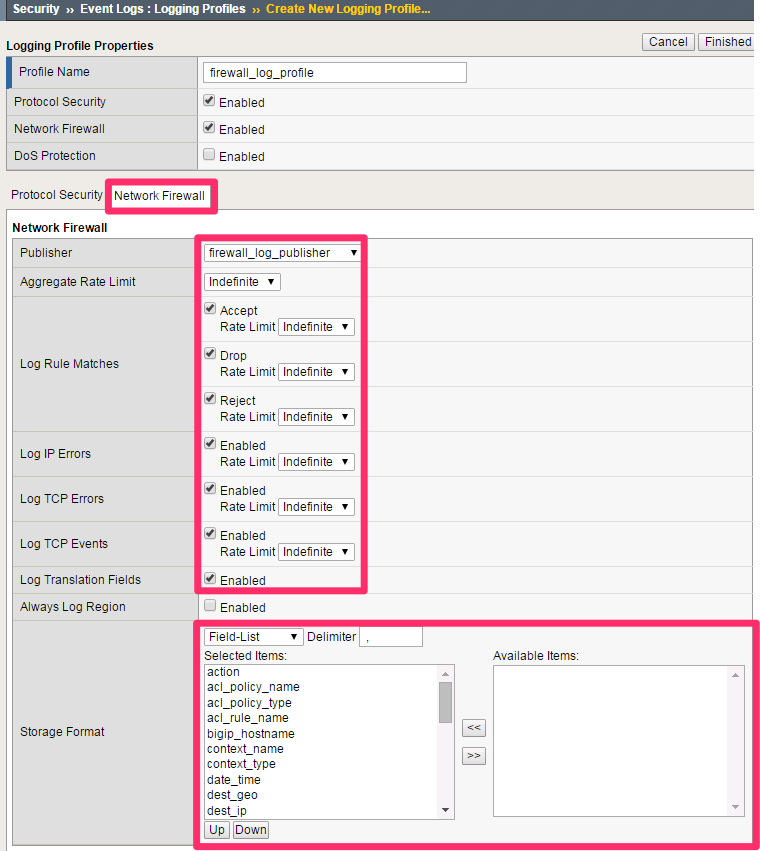
Note
Leave all other fields using the default values.
Navigation: Click Finished
2.1.3.5. Apply The Logging Configuration
Apply the newly created log profile to the external virtual server created in the previous lab.
Navigation: Local Traffic > Virtual Servers > Virtual Server List
Navigation: Click on EXT_VIP_10.10.99.30
Navigation: Security tab > Policies
| Log Profile | firewall_log_profile |
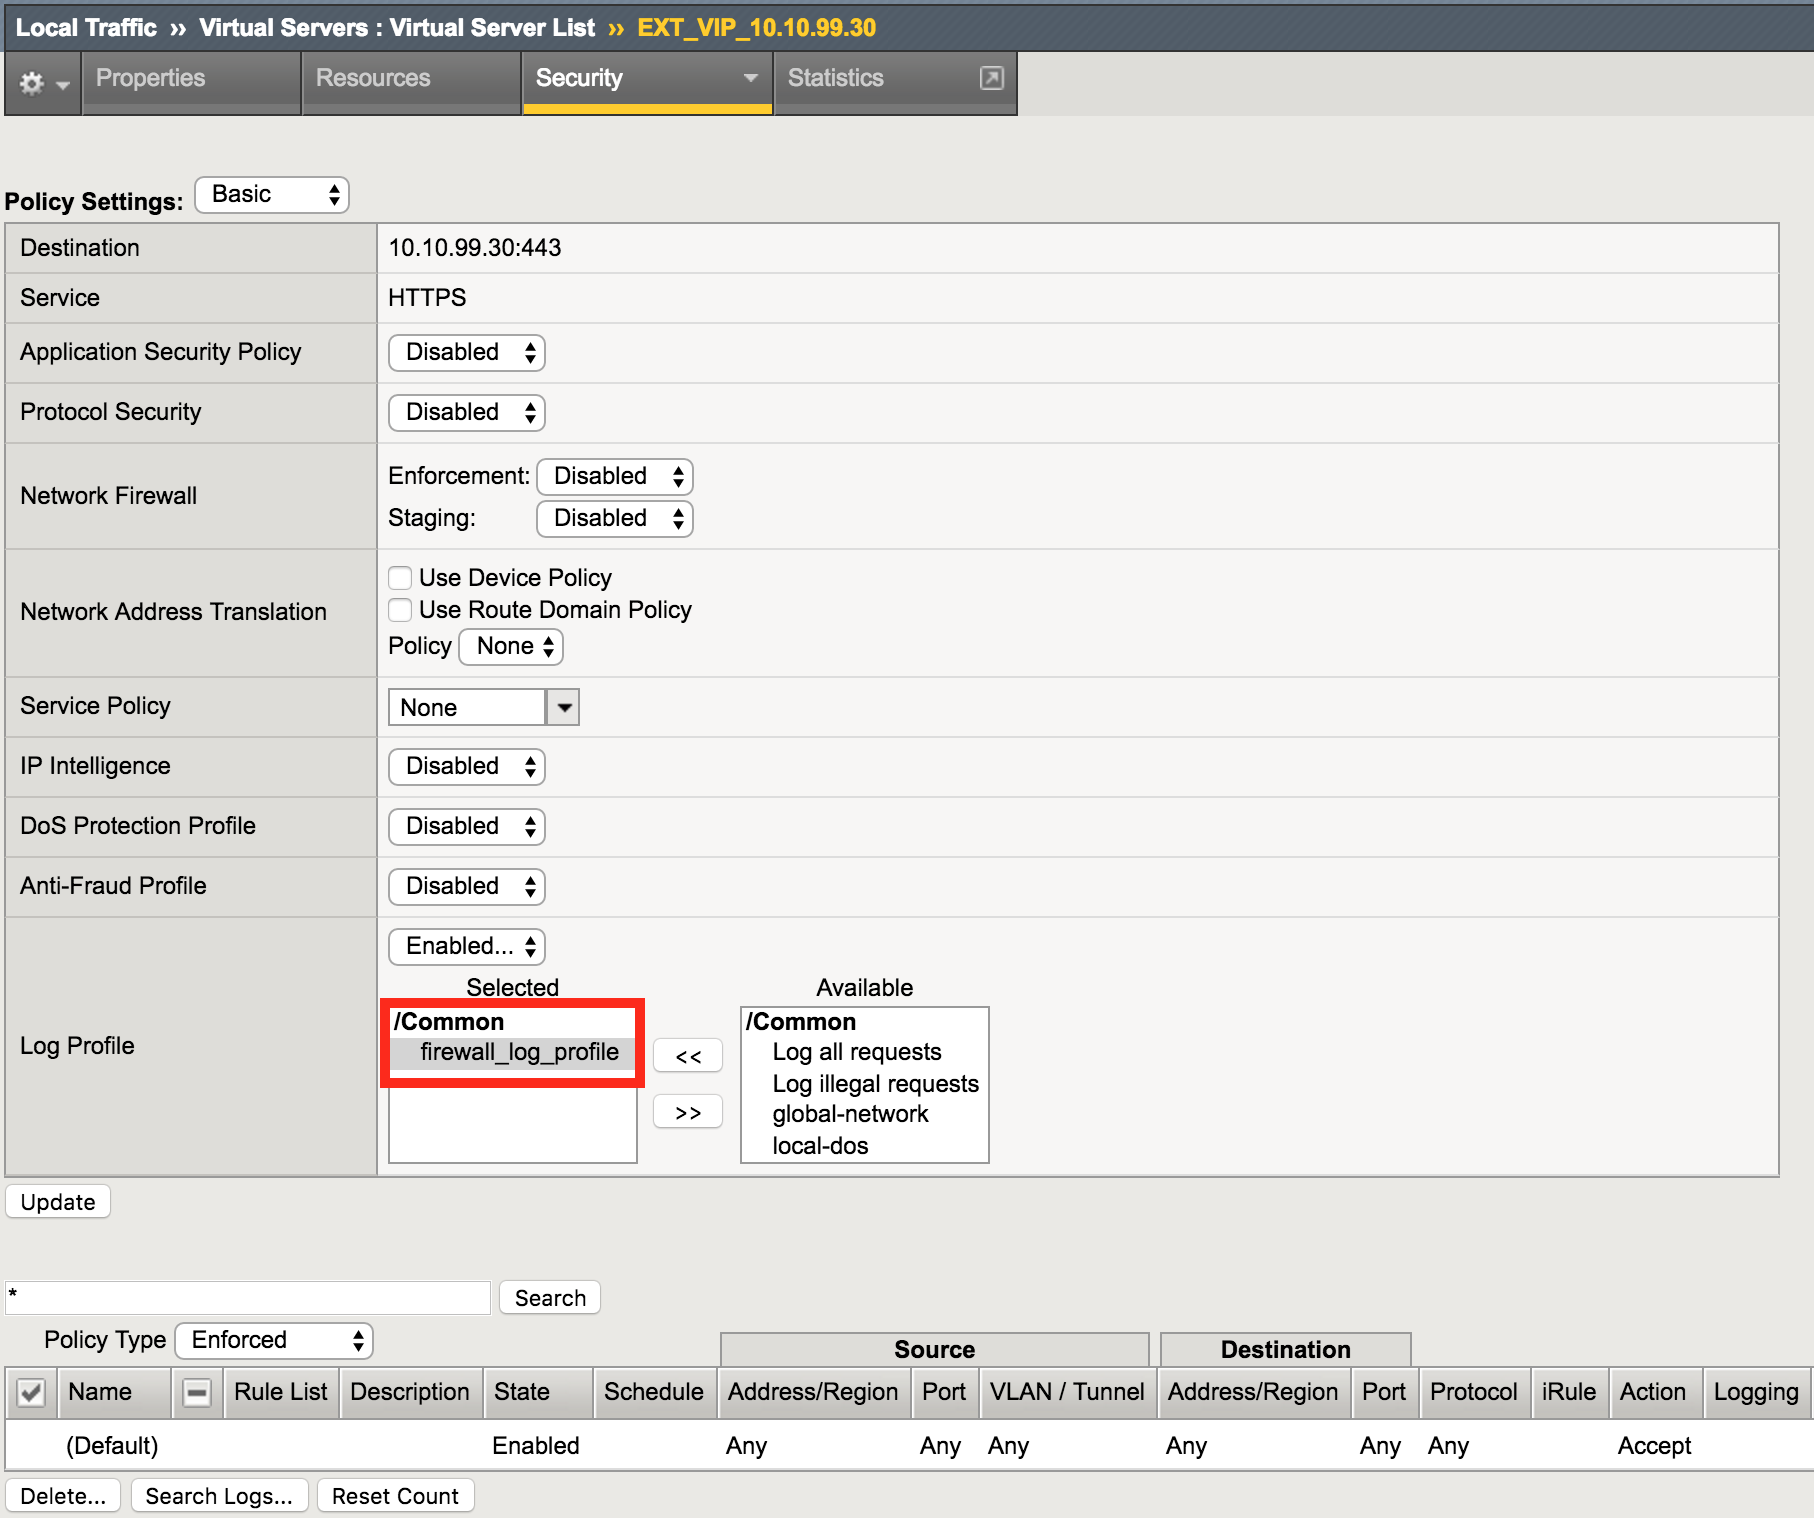
Note
Leave all other fields using the default values.
Navigation: Click Update
View empty network firewall logs.
Navigation: Security > Event Logs > Network > Firewall

2.1.3.6. Validate Lab 3 Configuration
Open a new web browser tab and access the virtual server or repeat the curl statements from the previous sections.
Note
This test generates traffic that creates network firewall log entries.
Navigation: Security > Event Logs > Network > Firewall
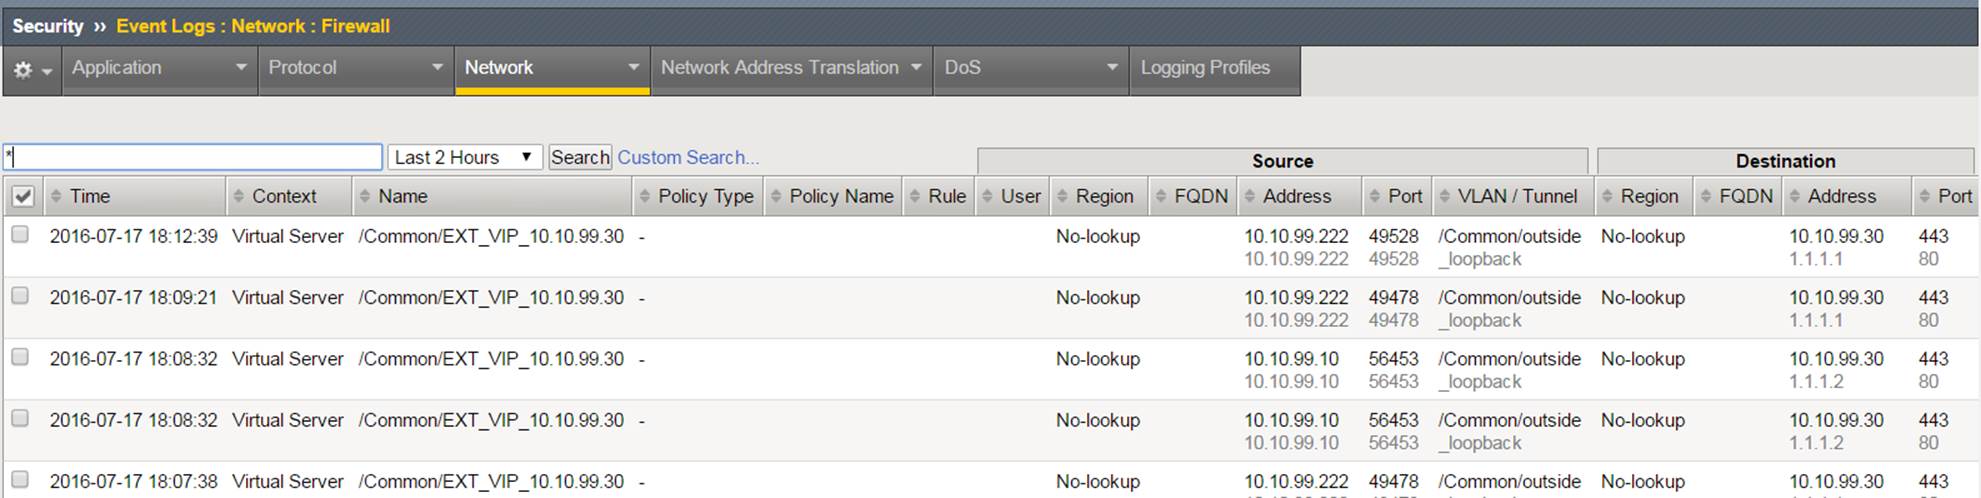
Attention
View new network firewall log entries. Examine the data collected there.
Note
This completes Module 1 - Lab 3